About Uploading Documents
Use the Manage Uploaded Documents link to upload the following:
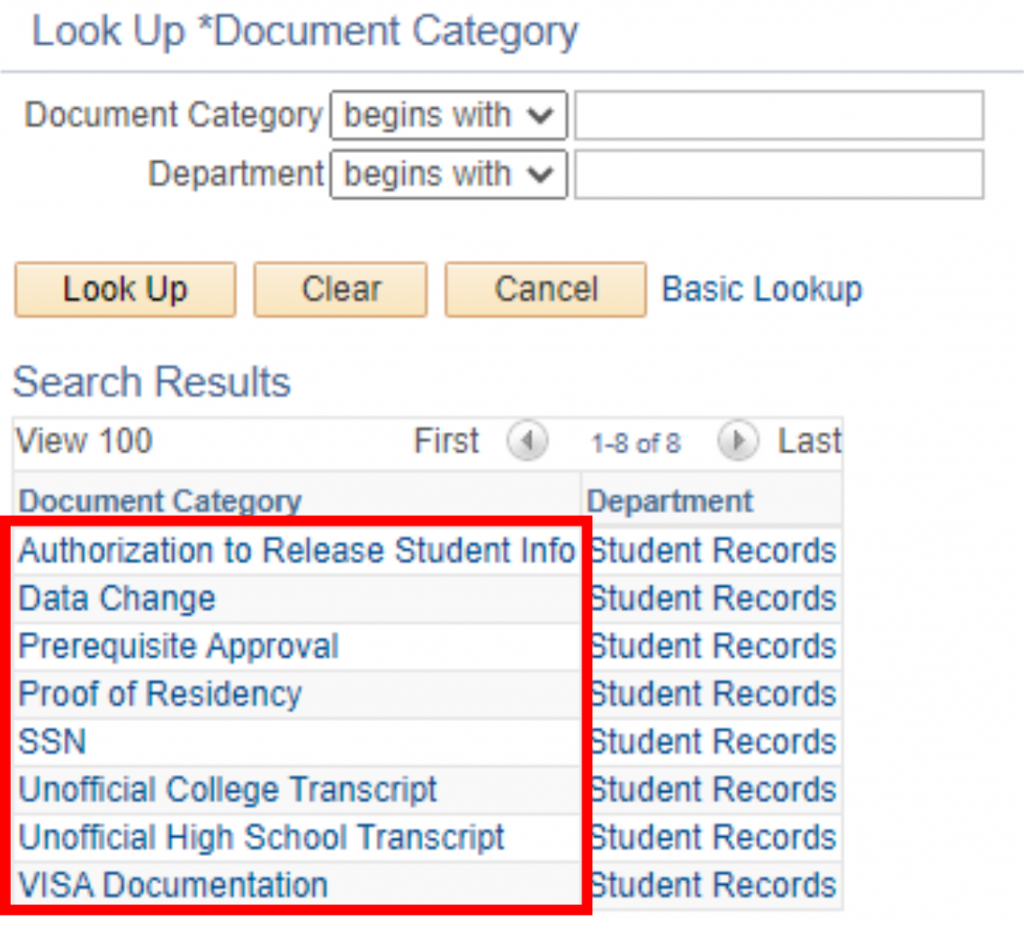
- Authorization to Release Student Info
- Data Change Form
- Prerequisite Approval
- Proof of Residency
- Social Security Card
- Unofficial College Transcript
- Unofficial High School Transcript
- VISA Documentation
The Data Change Form is for changes to your:
- Name
- Address
- Date of Birth (write in any changes for your DOB and send a copy of your photo id)
- Social Security Number
The following files are supported:
- BMP
- CSV
- DIR
- DOC
- DOCX
- GIF
- HTM
- HTML
- JPEG
- JPG
- MID
- MIDI
- MP2
- MP3
- MP4
- MPEG
- MPG
- PNG
- PPT
- PPTX
- RTF
- TIF
- TIFF
- TXT
- WAV
- XLS
- XLSX
- XML
How to Upload Documents
Login to your eSTORM account.
Click on the Student Center tile: 
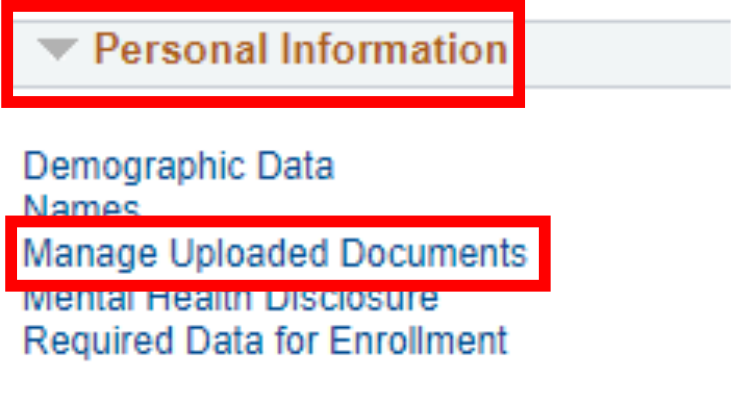
In the Personal Information section, click on the Manage Uploaded Documents link:
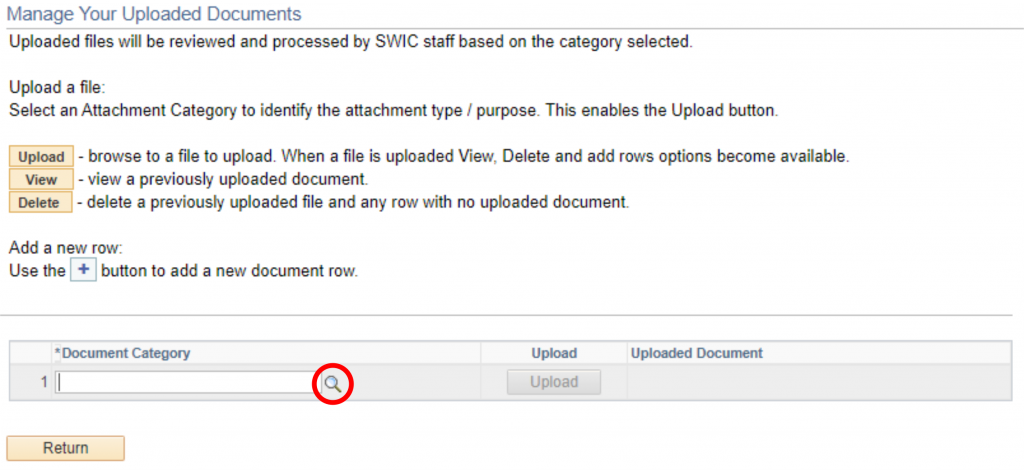
Click on the magnifying glass icon:
Select the Document Category:
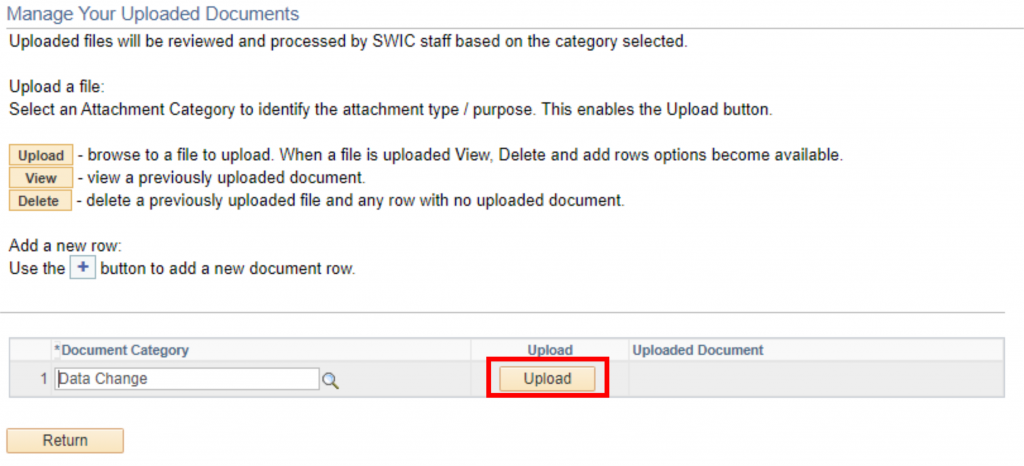
Next, click the Upload button to select the file you need to upload:
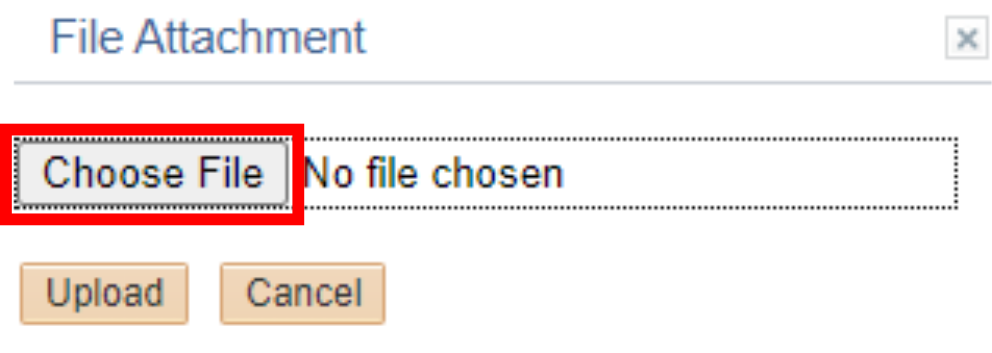
Click on Choose File to choose the file you need to upload:
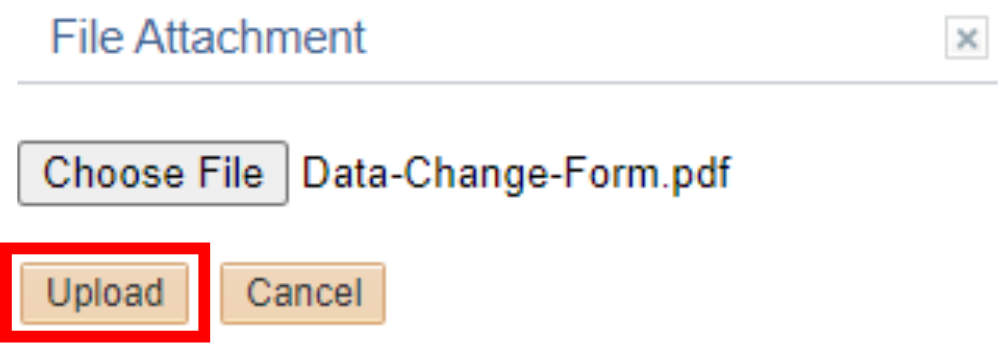
After choosing your file, click the Upload button:
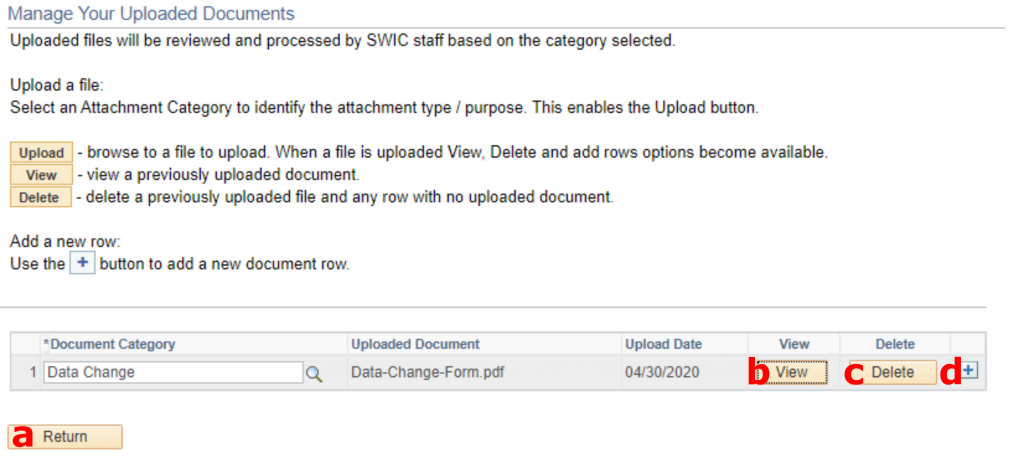
Your file is now uploaded to eSTORM for SWIC staff to review and process.
Click Return (a) to return to your Student Center.
Click View (b) to view the document you uploaded.
Click Delete (c) to delete the document you uploaded.
Click the plus sign (d) to add another document.
